DTTS requires each endpoint to ask adam:ONE (and adam:ONE only), for DNS services. Failure to do so, causes the endpoint to have no Internet access as soon as DTTS is enabled.
To make it a smooth transition, these are the simple steps to accomplish a gentle onboarding experience.
This article is a step-by-step instruction, and assumes the following
- adam:ONE is already installed (if not, see ASUS or pfSense installation)
- you have access to your dashboard account
- your subscription includes DTTS functionality
- your adam:ONE instance has layer 2 visibility to every endpoint
- your status is Online
If the above criteria is met, these are the next steps:
-
In advance of the installation, adjust the DHCP TTL settings (Windows has a default of a week) to just 60 minutes (note that if your TTL was a week, this step will need to be done a week in advance)
-
Switch all statically-assigned devices to utilize DHCP reservations instead (or be prepared to have a list of devices on which the DNS settings will need to be changed)
-
Repeat above for any/all network segments/VLANs
-
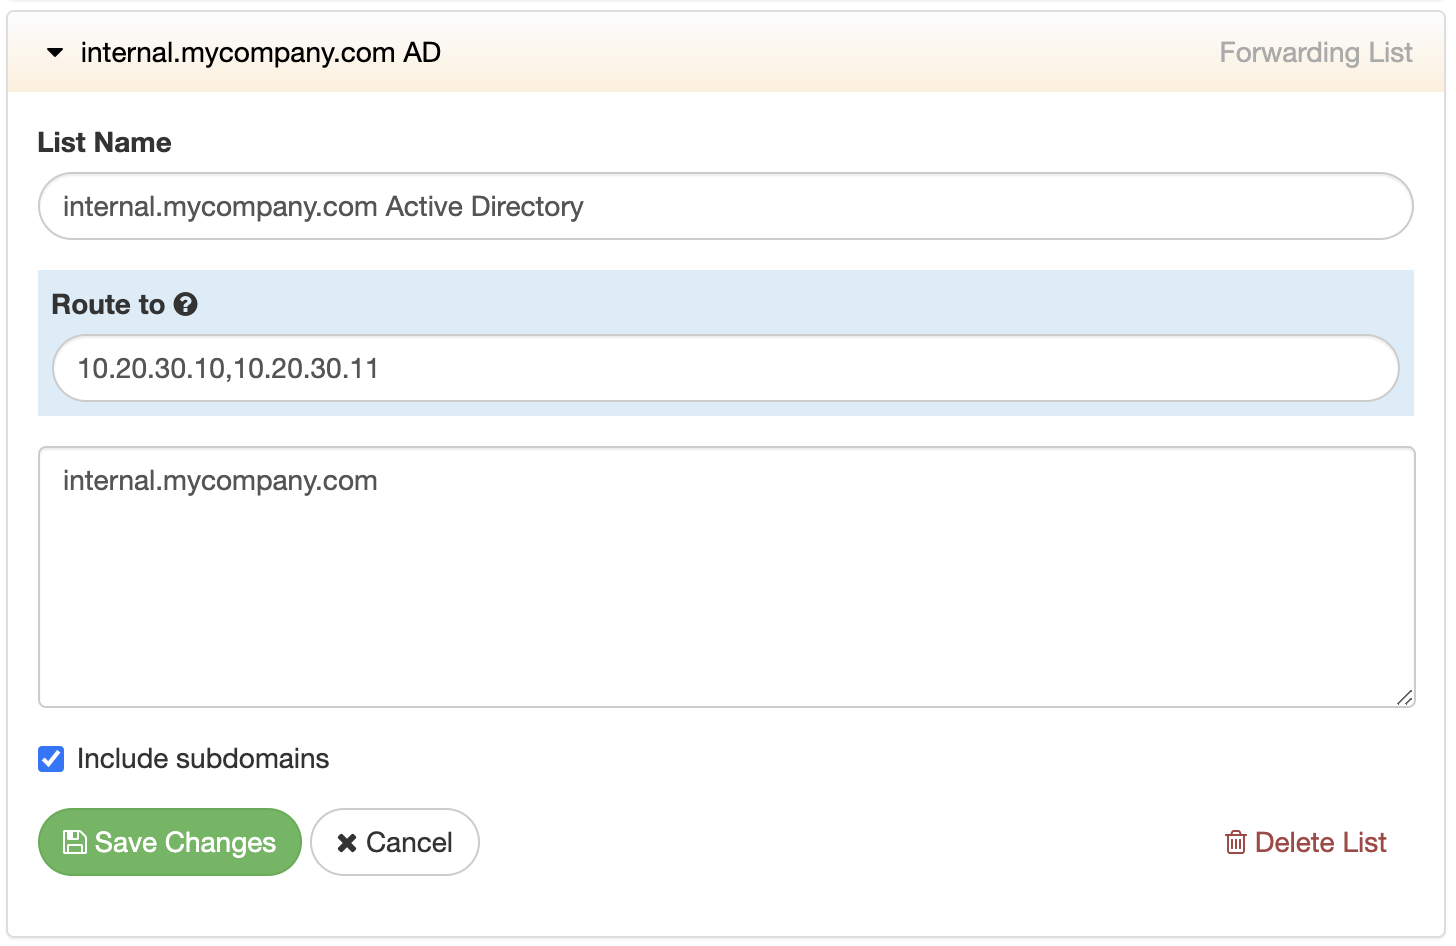
On your dashboard, navigate to My Rules and create a New List/Rule of type Forwarding, setting your domain, such as
internal.mycompany.comto be forwarded to your Active Directory Controllers, e.g.10.20.30.10(additional ones separated by comma if more than one AD controller exists at this site)
-
While on your dashboard, ensure the rule is turned ON for all of your policies that should have AD access.
-
Change your DHCP Server settings to point all DHCP clients’ DNS to adam:ONE internal IP
-
If necessary, wait for the one hour TTL for DHCP leases to pick up the change, or manually renew devices’ DHCP client details
-
If any devices remain with static assignments, confirm their DNS setting is set to adam:ONE internal IP
-
All Active Directory Controllers (behind this adam:ONE instance) must set the Microsoft DNS SERVER properties → Forwarders tab to be adam:ONE only (e.g. 10.20.30.1)
-
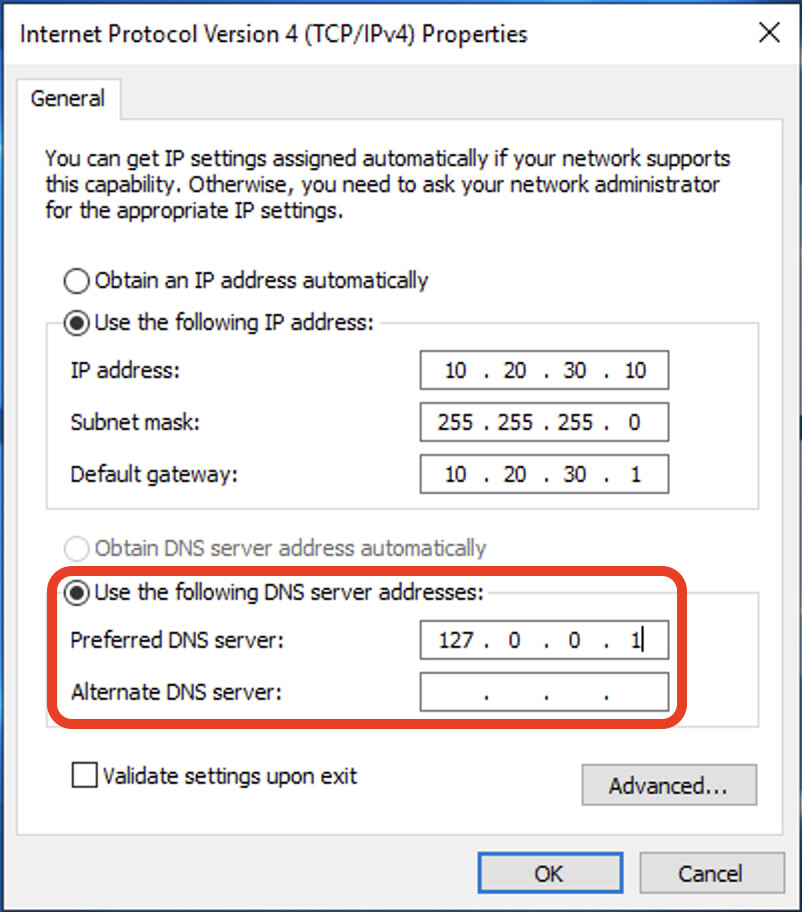
All Active Directory Controllers themselves need to have the interface setting itself changed to use DNS of 127.0.0.1 only
-
Verify functionality by testing with Microsoft’s nslookup test for SRV records instead querying adam:ONE rather than an AD controller
-
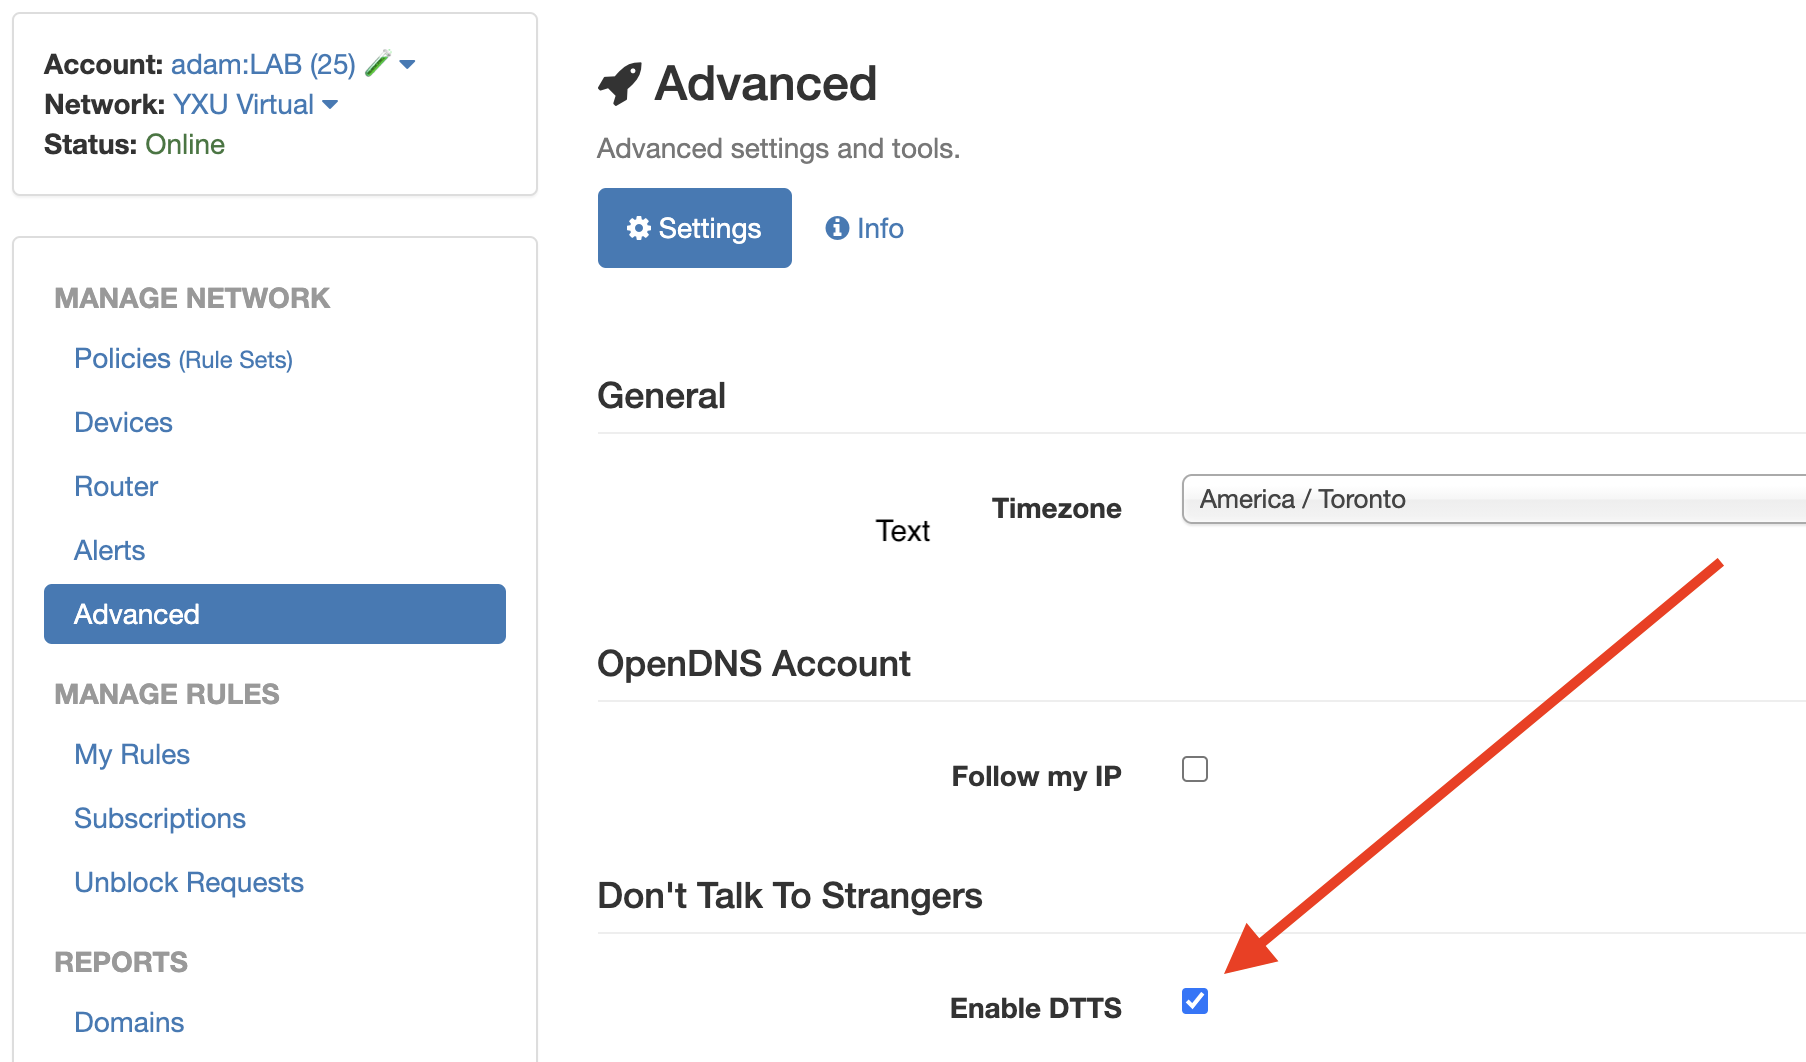
On the Dashboard, select Advanced → Enable DTTS
-
If running on pfSense, navigate to pfSense → Services → adam:ONE → Setup Firewall for DTTS (this step is not required on other platforms)


A simple test to confirm DTTS is functioning as expected, attempt to visit http://1.1.1.1 or https://1.1.1.1, neither of which should be reachable.
For any services you require to function without their destinations being looked up by DNS, create pfSense Enablers and feel free to use our centrally-maintained fwaliases.